¶ Templates
The template builder is a new feature in SnapPlus 3 that is intended to replace (and expand upon) the functionality provided by the "rotation wizard" in version 2.
¶ Using management templates in the Field View
Template features are available on the field view by clicking the templates button on the toolbar found above the crop data table. This will expand to show four options:
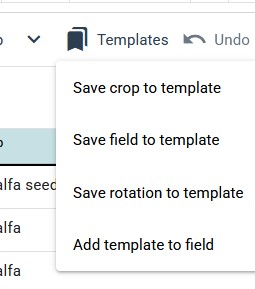 |
Save crop to template: make template from crop and application data.* Save field to template. make template from all crop and application data. Save rotation to template. make template from all crop and application data within rotation.** Add template to field. insert and replace crop data on field using template.* * indicates that a crop must be selected. ** indicates that rotation practices must be set. |
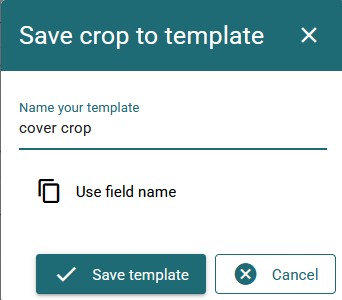
Saving crop data into a template will display an input dialog:
Adding crop data will open a popup with a detailed preview of field data after applying changes. The template will apply starting in the year of the crop selected in the table.
¶ Template Builder
If no templates have been created in a plan, the only thing visible on the page will be an editable dropdown where you can enter a name for a template:

There is a notice that a unique name is required -- this will only be a potential issue if you have more than one template saved to your plan. On entering a name for a template, it will be automatically saved and more features will become available.
SnapPlus will begin by inserting a placeholder crop as the first crop in the template sequence. This works the same as it does on the field view. To start, select the crop and begin filling in data. Proceed by adding, deleting, and modifying the template crop sequence as you would on the field view.
Once at least one template crop's data has been filled out, more configuration options for the template become available:

¶ Contouring and filter areas
Rotational field practices can be assigned to a template. When the template is used, these practices will apply to the field, overwriting any existing field practice settings on that field. They can be modified at the individual field level when applying a template from the preview popup.
¶ Cycle Template
To set the template rotation starting on a different year, use the cycle feature. The planting order of crops in a template can be adjusted using the cycle template button. Cycling a template is equivalent to starting a rotation on the second year. So, to start the rotation on the third year, cycle twice, and so on. For example, starting with this template:

Cycling once will adjust the order of crops to start at the second year:

Cycling once more will change the starting year again:

Cycling once further will return the template to its original order.
¶ Additional Rotation Settings
Field-level rotation settings can be modified in the template builder:
- Use as rotation: If the template has enough years worth of crops to meet the minimum rotation length (3 years for 590, 5 for CAFO), this option will be available. Selecting use as rotation will overwrite existing rotation settings on all fields to which the template is applied.
- Fit to existing rotation: This option is available regardless of the number of crops in the template, but it will only make a difference on fields that already have rotations set on them. Using this option will increase rotation length and adjust start year so that the template crops fit in a rotation that has already been set.
- Number of rotations: Adjusting this value will increase or decrease the amount of times that a template's crops are applied to a field. Templates can be applied at most 8 times to a field.
Note that use as rotation and fit to existing rotation are mutually exclusive settings.
¶ Summary Preview
Selecting use template in the template builder tab will trigger a popup window where you can select fields to which you would like to apply template crops. SnapPlus then checks if there are any issues with applying the template to the fields selected. SnapPlus will present an at-a-glance summary of the process of applying the chosen template to the selected fields, and offer some options to modify data before applying. This is called the summary preview:
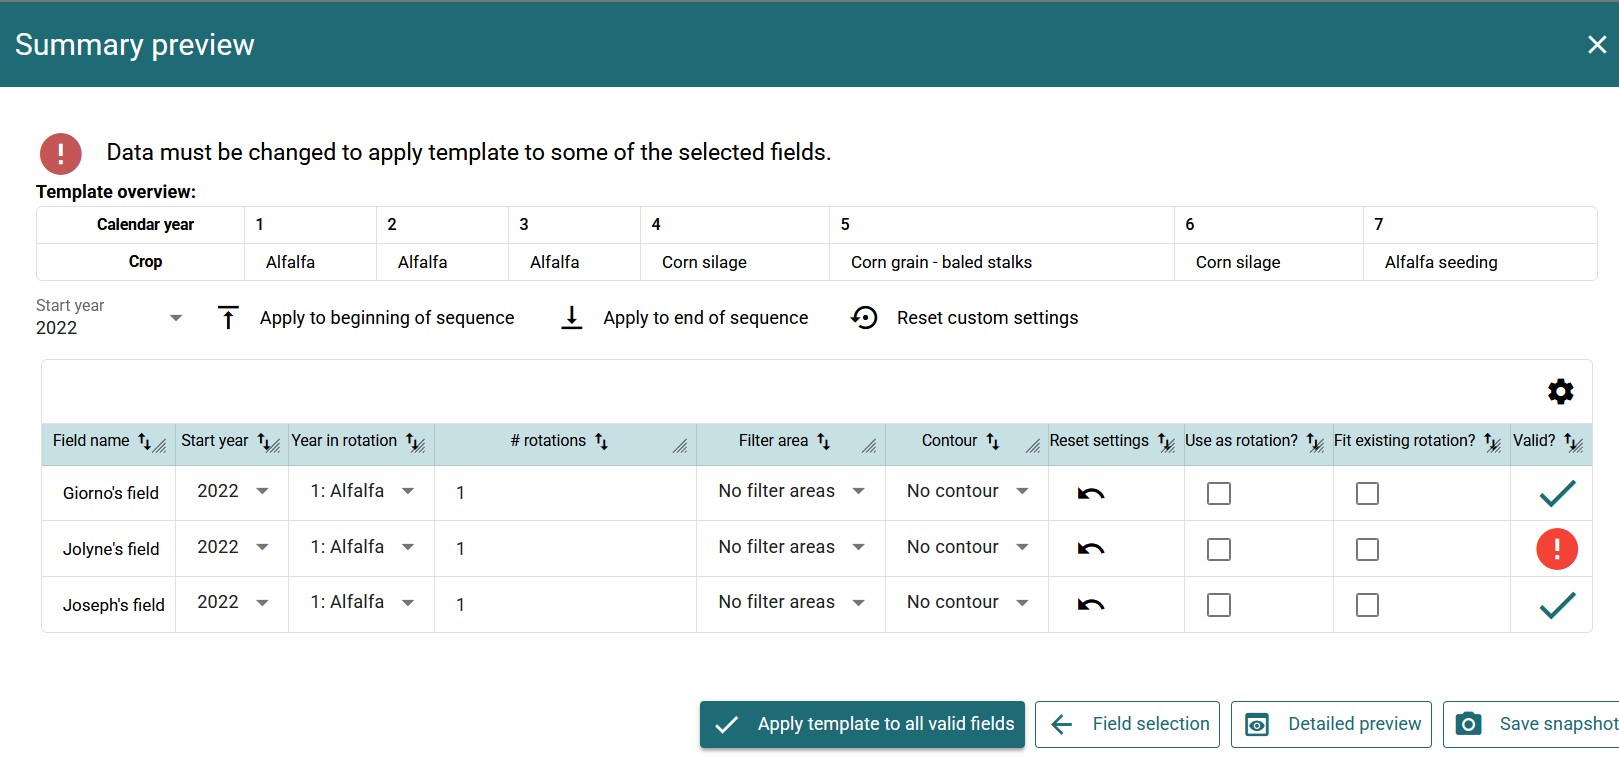
From the top down, this preview popup includes:
- Warning, if applicable, that the template cannot be applied to some of the chosen fields. Some issues may be addressable from within the preview popup, others requiree entering the detailed preview.
- Overview: a basic summary of which crops are in the template, and in which years they occur.
- Toolbar with controls,: with a few ways to modify template application settings to multiple fields at once:
- Start year: this will set the year that the first template crop applies on every field. In the above example, that means that the corn grain in template year 1 wil be planted in 2026 on each of the fields, the snap beans will be planted in 2027, and the small grain silage will be planted in 2028.
- Apply to beginning/end of sequence: these buttons will effectively set the start year of the template crops on each field to the earliest or latest possible year that will maintain a continuous sequence of crops. For example:
- Apply to beginning: the template pictured above has 3 years of crops. Suppose the target field also has three years of crops, starting in year 2026. Applying a template to the beginning of that field will set the years of the 3 template crops to 2023, 2024 and 2025.
- Apply to end: using the example just mentioned, this button would set the years of the 3 template crops to 2030, 2031 and 2032.
- Templates beginning on fall-planted crops: if the first crop in a template is fall planted, the end of the sequence may be the last year of the existing sequence, rather than the one after. Suppose the example in the above cases ends on a spring-planted corn crop in 2029. Applying a template that starts on fall-planted cover crop to the end of that sequence will put the first template crop in 2029.
- Reset custom settings: this will revert any changes made to the way that the template applies to the chosen fields.
- Template preview data: below the toolbar is a standard SnapPlus data table with information about the template being applied to a specific field. Settings for individual fields can be modified in the cells of this table. The Valid? column will display an icon that represents whether an issue was found using the template on the given field. Clicking the icon, regardless if it is a check or a warning, will navigate to the detailed preview. More on that later.
- Navigation buttons: the buttons at the bottom of the preview popup have a variety of functions:
- Apply template to all valid fields: this will use the settings shown in the preview and save template crop data to fields.
- Field selection: this will return to the field selection popup, which will start the template application process from the beginning. As of writing (10/3/2025), this will erase any custom field settings and unselect any previously chosen fields.
- Detailed preview: this navigates to the detailed preview. More on that later.
- Save snapshot: saving a snapshot of plan data is always a good idea before making any sweeping changes, like overwriting crop data for more than one field at a time.
¶ Detailed Preview
The detailed preview allows more fine-grained modifications to template application settings, which may be necessary depending on the fields being targeted for template application and the crops in the template.
Continuing with the above example, the detailed preview for Jolyne's field can be accessed in a few ways:
- Clicking on the icon in the Valid? column.
- Selecting the field in the data table, then clicking the detailed preview button on the bottom of the summary preview popup.
- Once in the detailed preview, navigation between fields is possible using the buttons below the field name. Navigation between fields that pose issues for template application is also possible using the show invalid fields button, which will bring up another popup with a list of fields with problems.
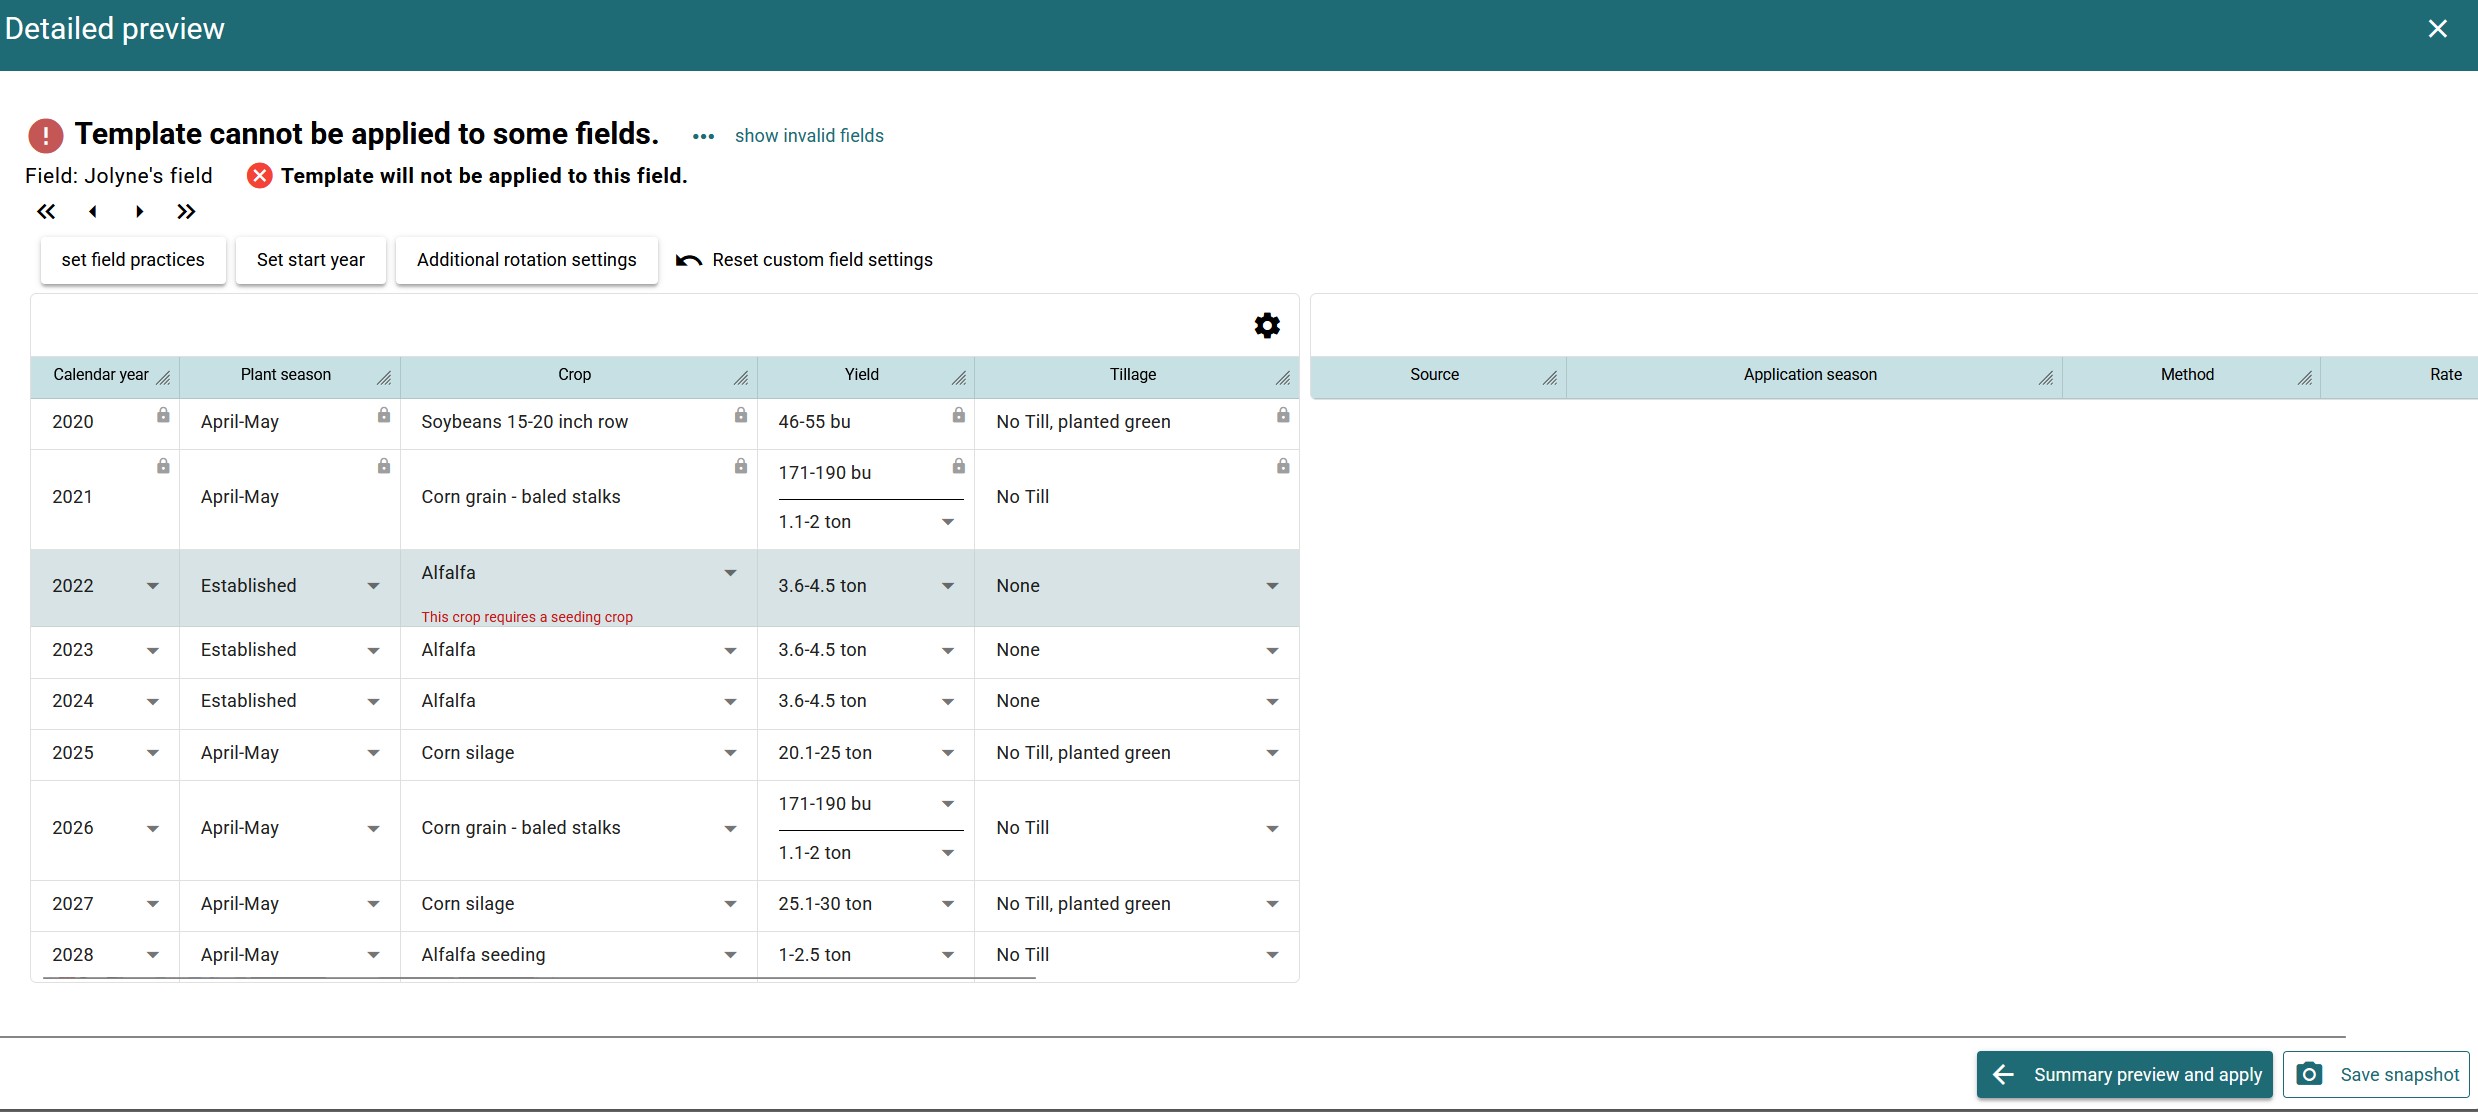
Data or template settings can be adjusted as needed to make the template valid to apply to the given field. Any other customizations to template data can also be made on a field-specific basis. Making changes to the template in either of the preview screens will not save changes to the template in general. SnapPlus follows the same rules in the template application process as it does when saving crop data anywhere else, and the error messages will display in the same way. Note that only template crop data can be modified in the detailed preview (in this case, for example, changes can't be made to the 2021 April-May planted Corn grain, because that crop is on the field, not part of the template).
¶ Templates and the Annual Updates Tab
Templates with only one year of crops can be used to replace crop data using the annual update features. Templates with only one crop in them can also be created from the annual update crop data table in the same way as described in the section on creating templates from the field view tab. Some example uses of this combination of features are:
- Replacing all the plantings of some crop in a year with another (all my corn grain in 2026 was actually corn silage)
- Adding a year of the same crop to a bunch of fields (all my fields in some group or subfarm, or on the whole plan, will be getting corn silage in 2027)